
IIS stands for Internet Information Services. With the help of IIS it is possible to host and manage websites and web apps on Windows servers. To install IIS, simply follow these steps.
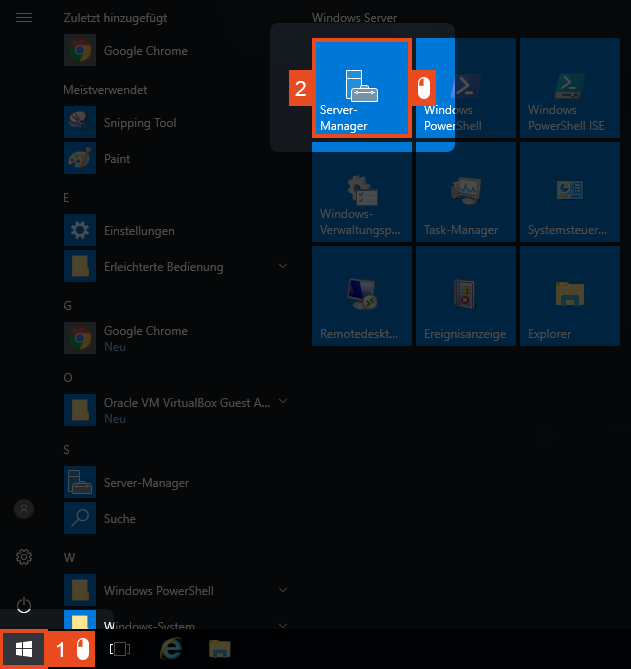
First, start the Server Manager. To do this, click Start and then Server Manager.
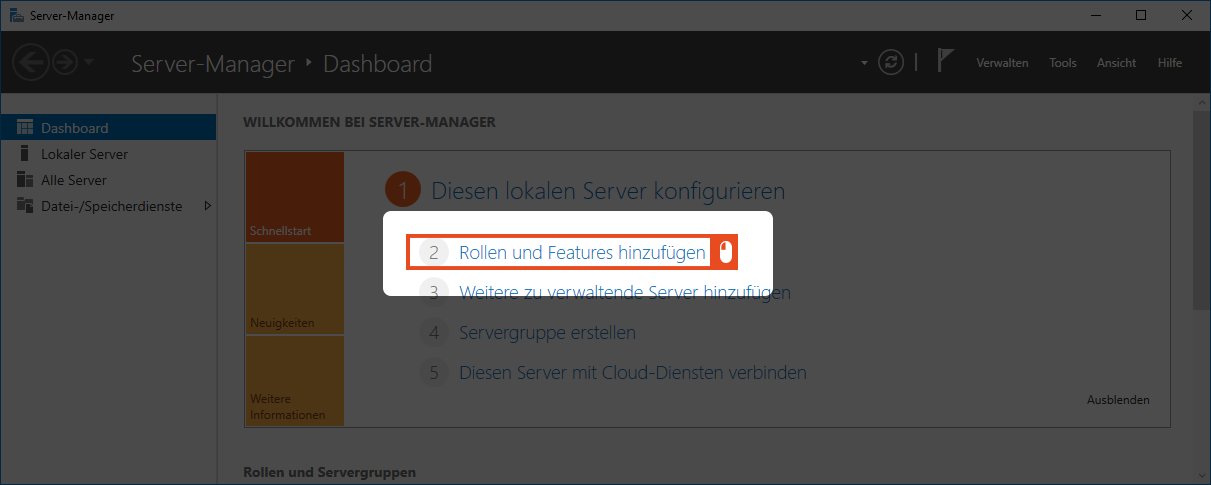
Then click Add Roles and Features.
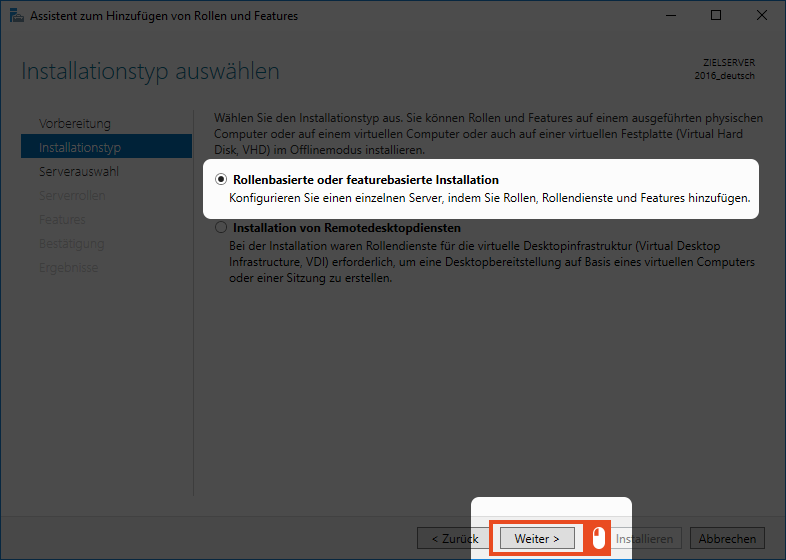
A wizard opens with which the installation is carried out. Here you select Roles and Feature-based installation and then click Next.
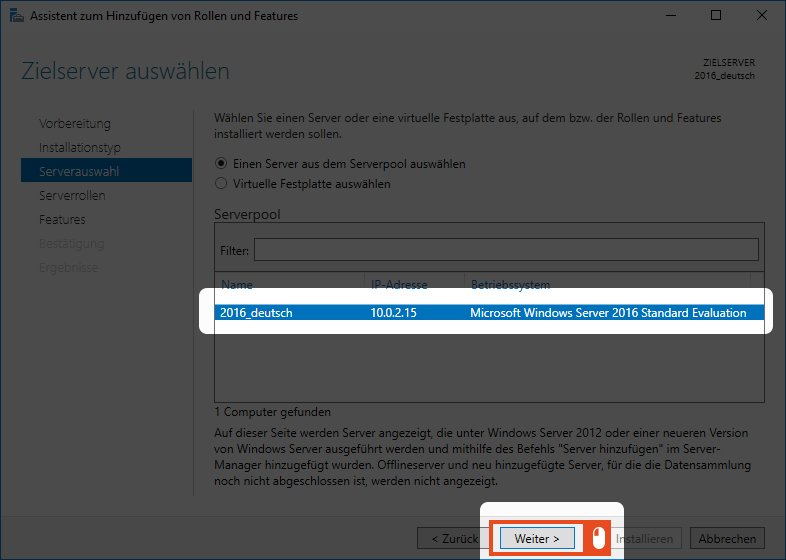
The next step is to specify the Target Server for the installation. Select the server on which the installation will take place and click Next.
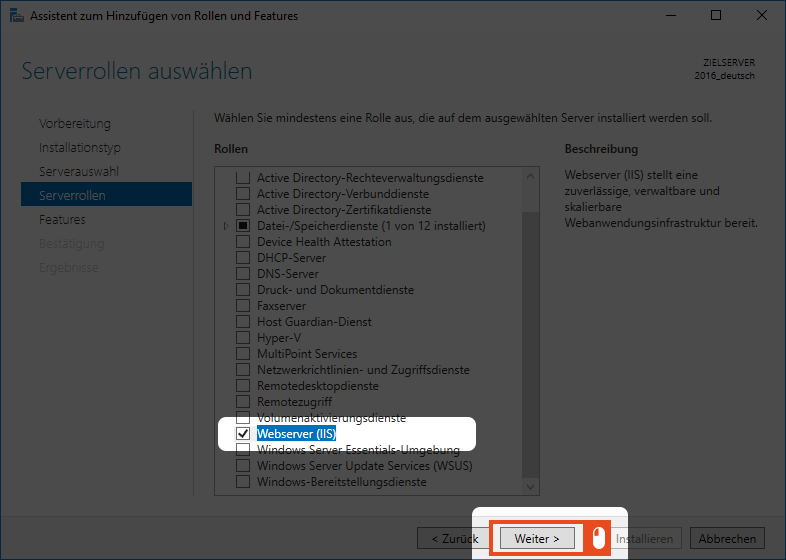
In the next window, select Web Server (IIS) and click Next.
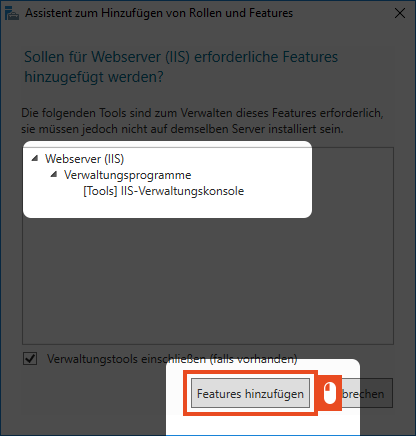
A new window will open informing you that additional features are required for the installation of IIS. Confirm the message by clicking the Add Features button.
Now, under Role Services, select Windows Authentication, which you will find under the Security section.
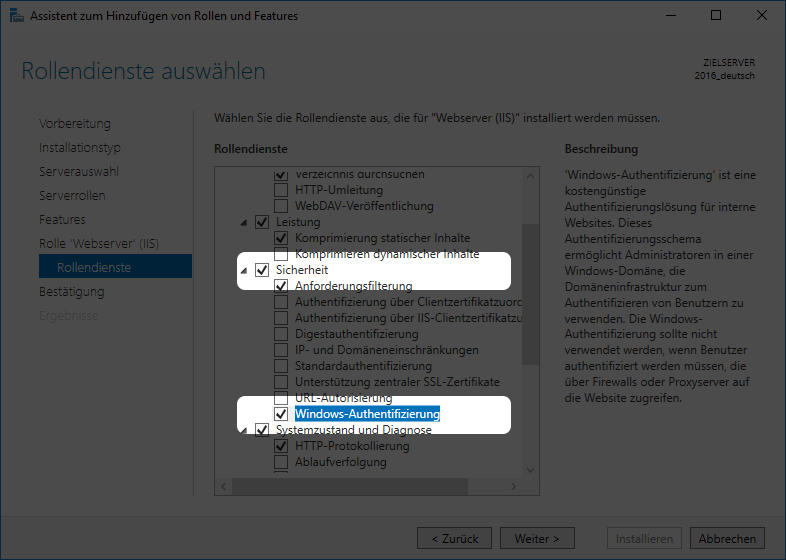
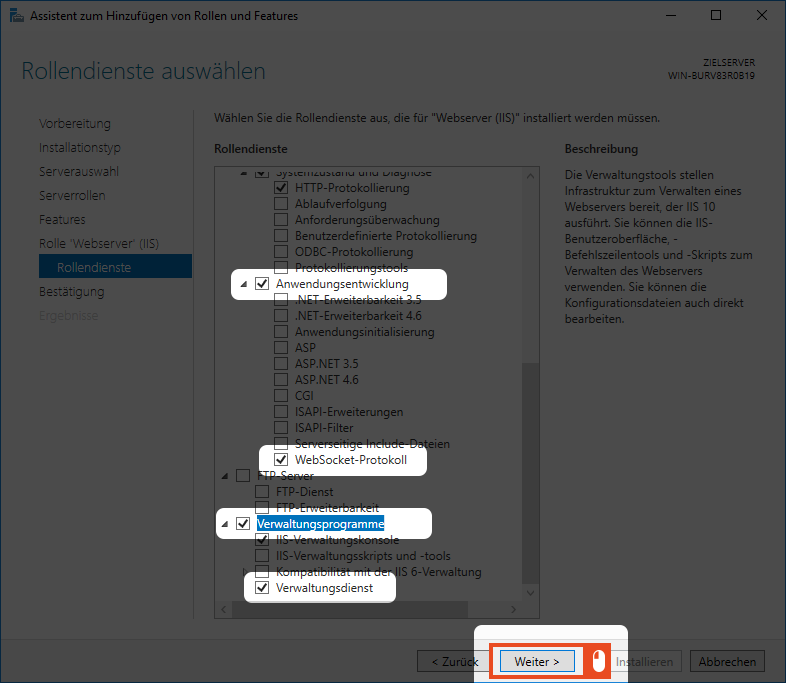
Before you complete the installation, select the WebSocket protocol under Application Development and the Management Service under Management Tools. Confirm the selection with Next.
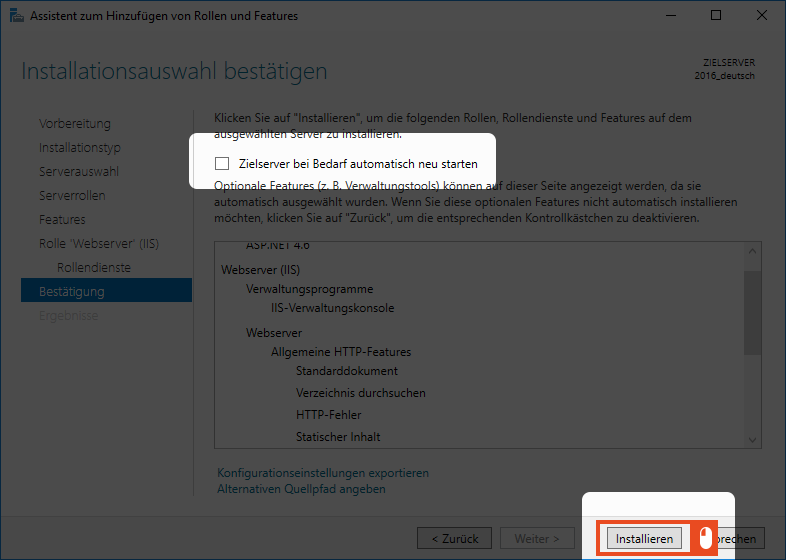
To confirm and start the installation, click Install. You have the option to have the server restart automatically if you select the option restart target server automatically if required. You should note that the server will not be available during the restart.
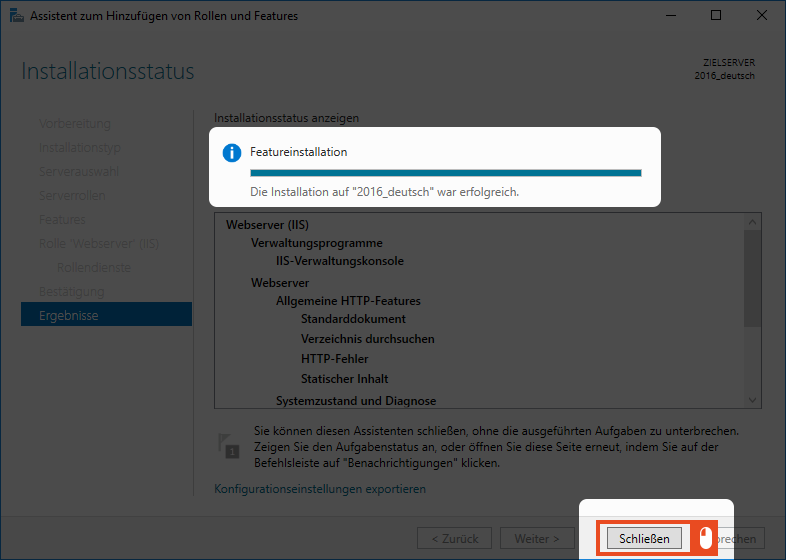
After the installation, a summary will be displayed. Click the Close button to finish the installation.