

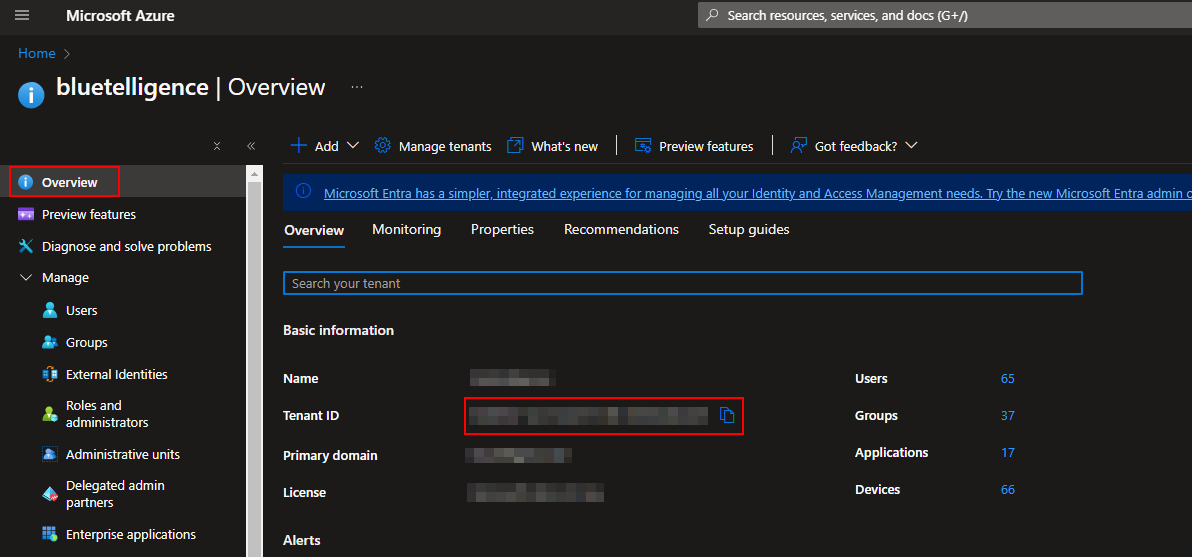
Tenant ID
Go to Microsoft Azure and choose Microsoft Entra ID > Overview
Step by step guide
Azure Portal
App registration
-
Access App registration in Azure Portal
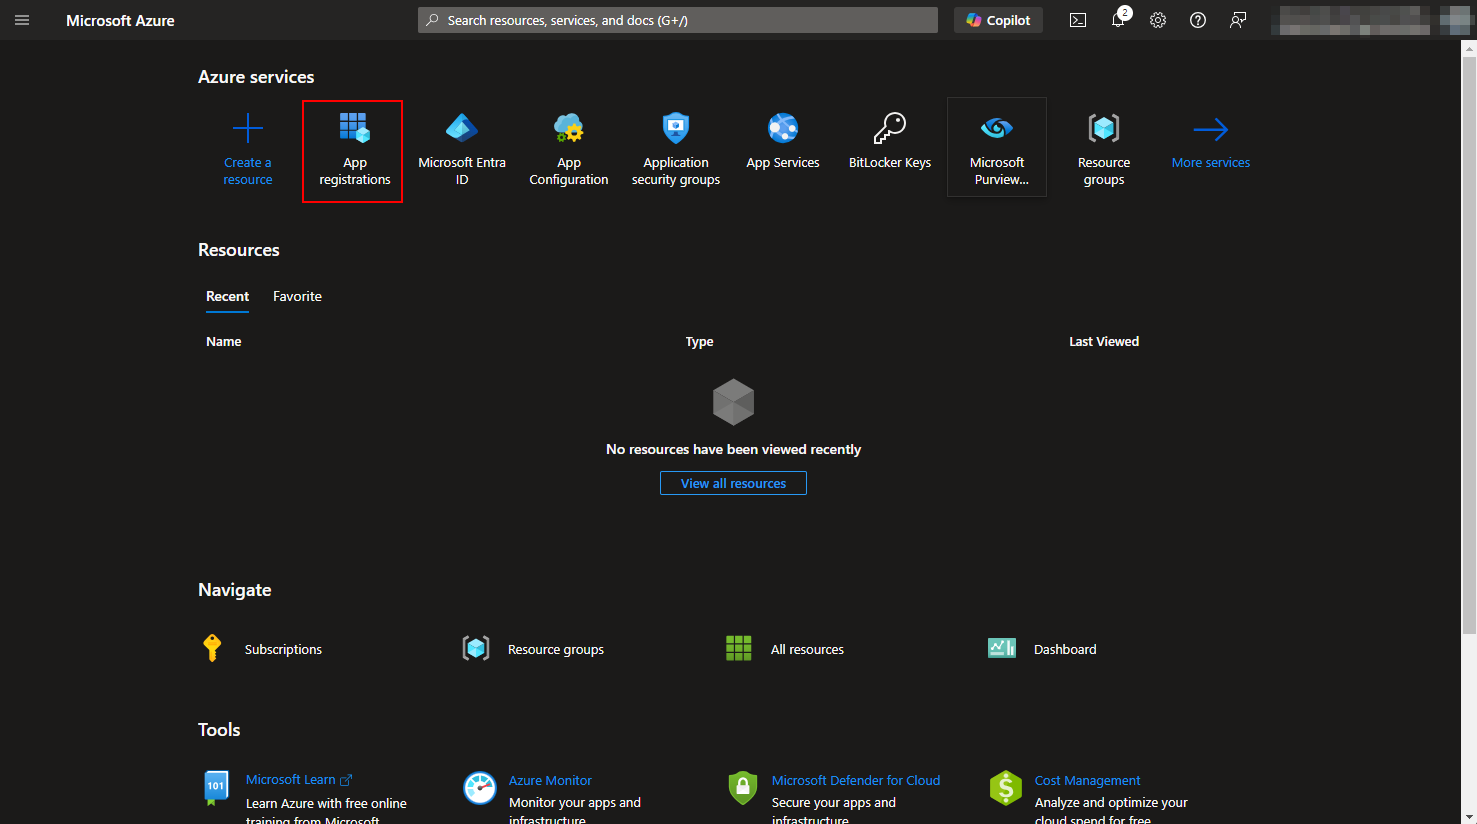
-
Create a new registration
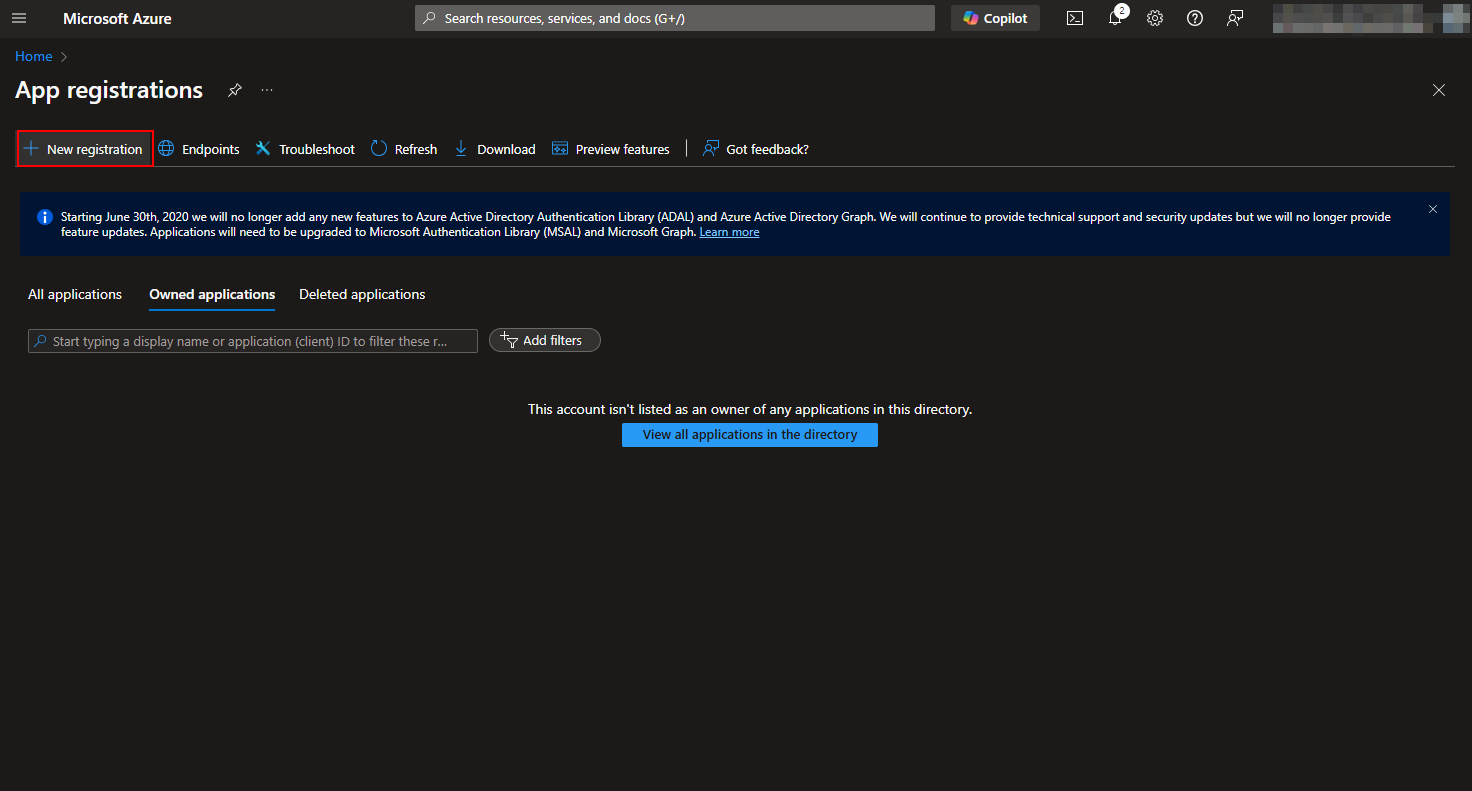
-
Name it e.g. “Enterprise Glossary - Power BI”, set it to “Accounts in any organizational directory (Any Microsoft Entra ID tentant - Multitenant)” and register
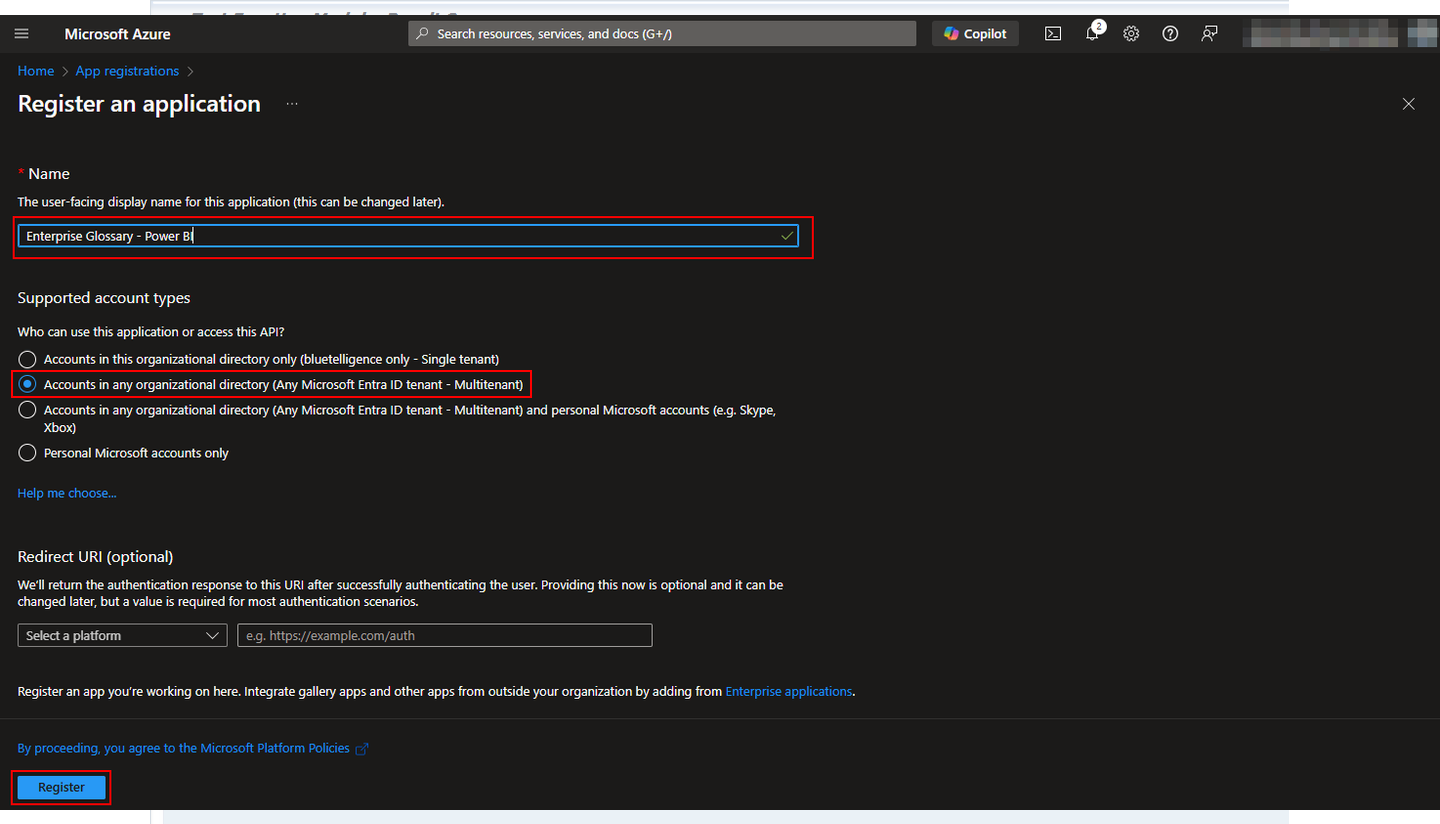
-
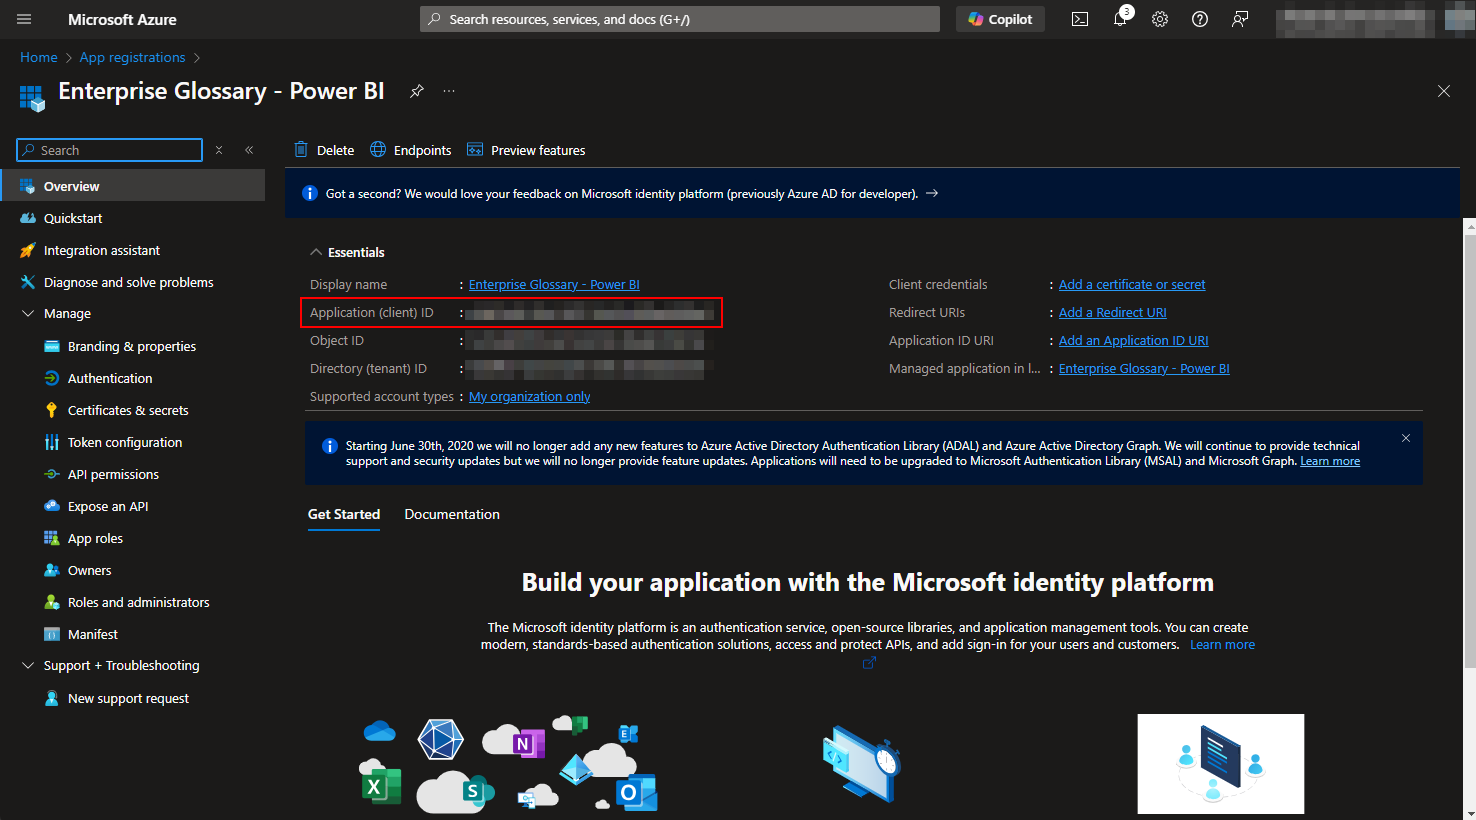
On the next page the Application (client) ID is what is needed for as Client ID in the Power BI connection in Enterprise Glossary.
-
Create Secret
-
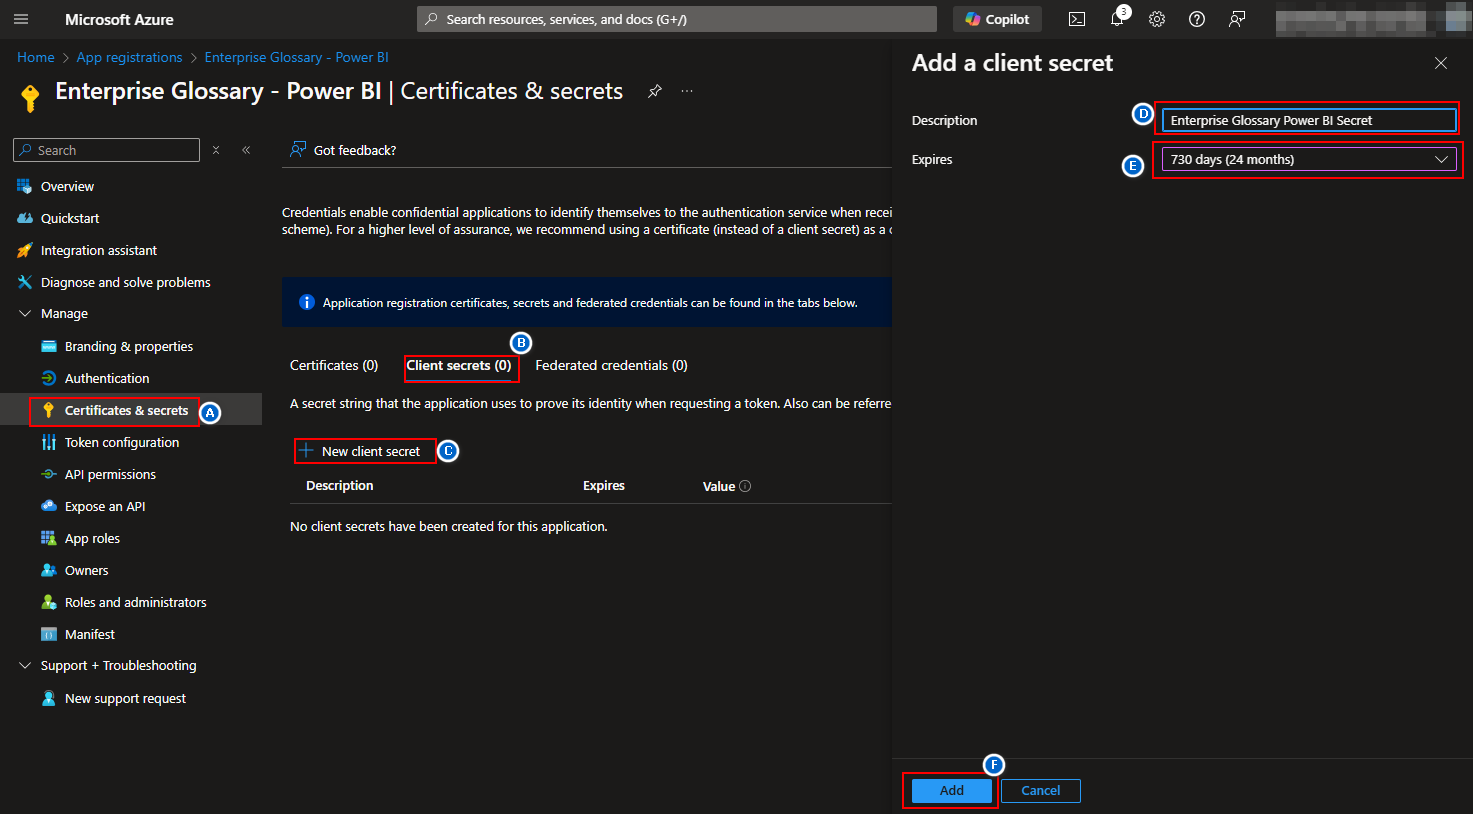
Go to “Certificates & secrets”
-
Choose “Client secrets”
-
Select “New client secret”
-
Enter a Description (e.g. Enterprise Glossary Power BI Secret)
-
Enter Expires value (e.g. 24 months)
-
Click “Add”
-
-
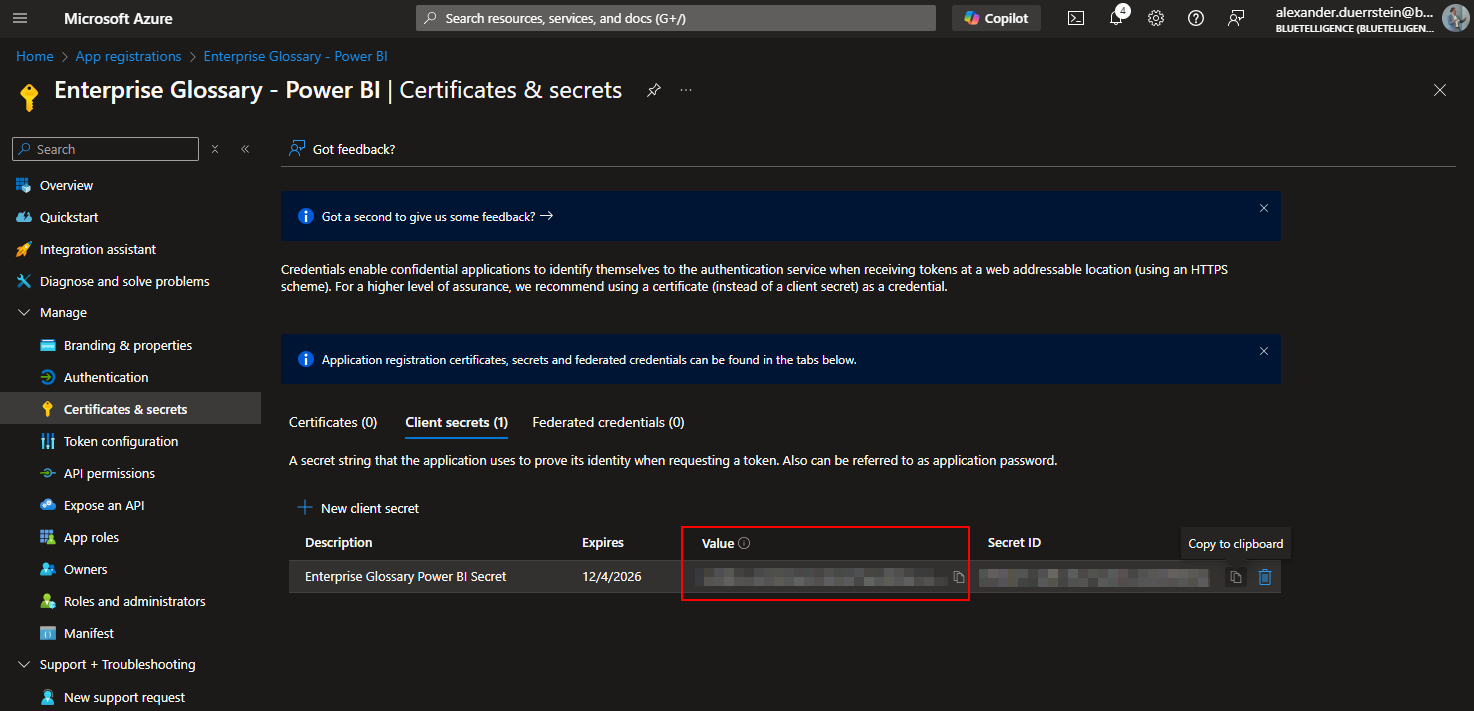
Copy Value of the next page as Client Secret
-
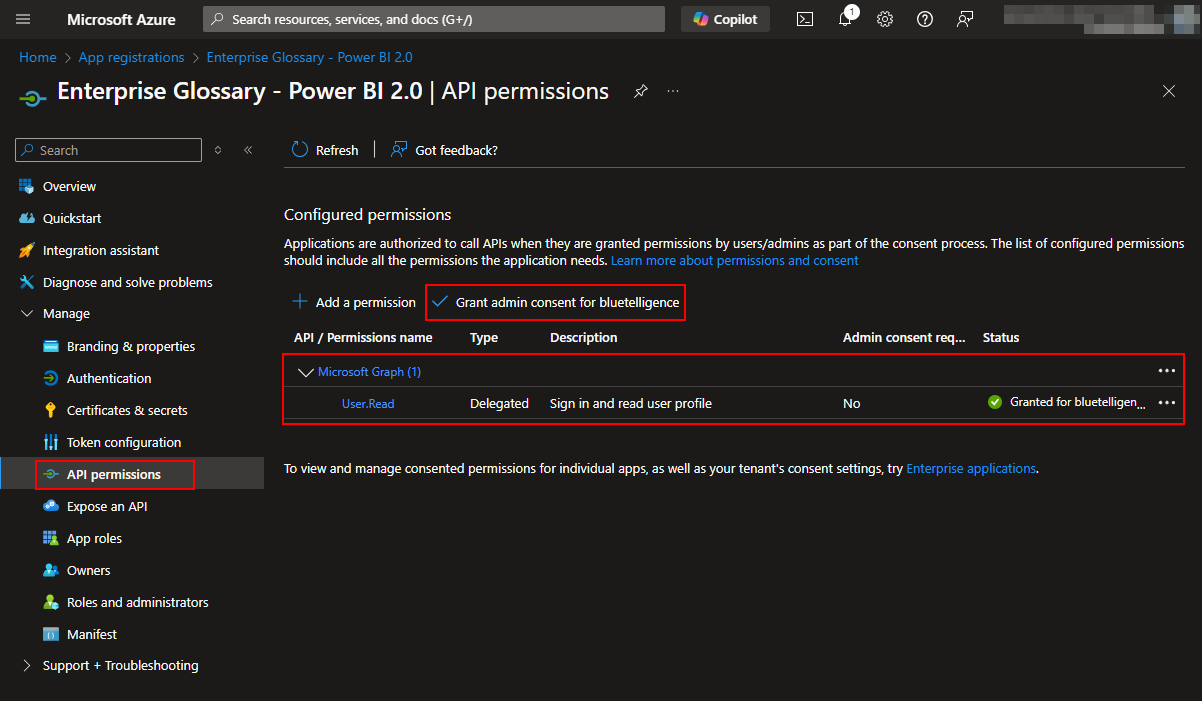
Assign User.Read Permission of Microsoft Graph by going to API permissions and pressing “Grant admin consent for xxx”
Create Group in Entra ID
Create Group in Entra ID
-
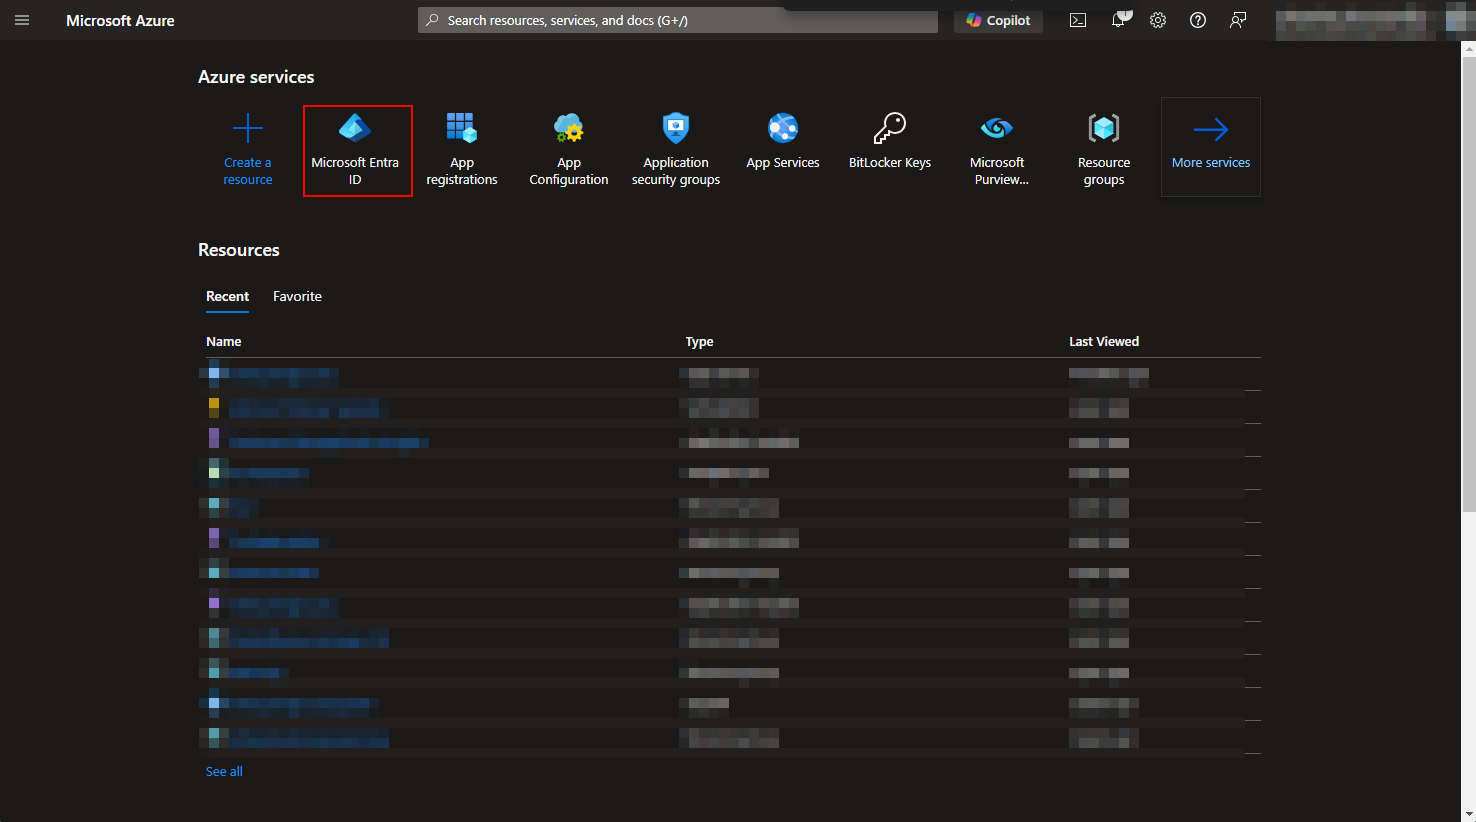
Go to Microsoft Entra ID
-
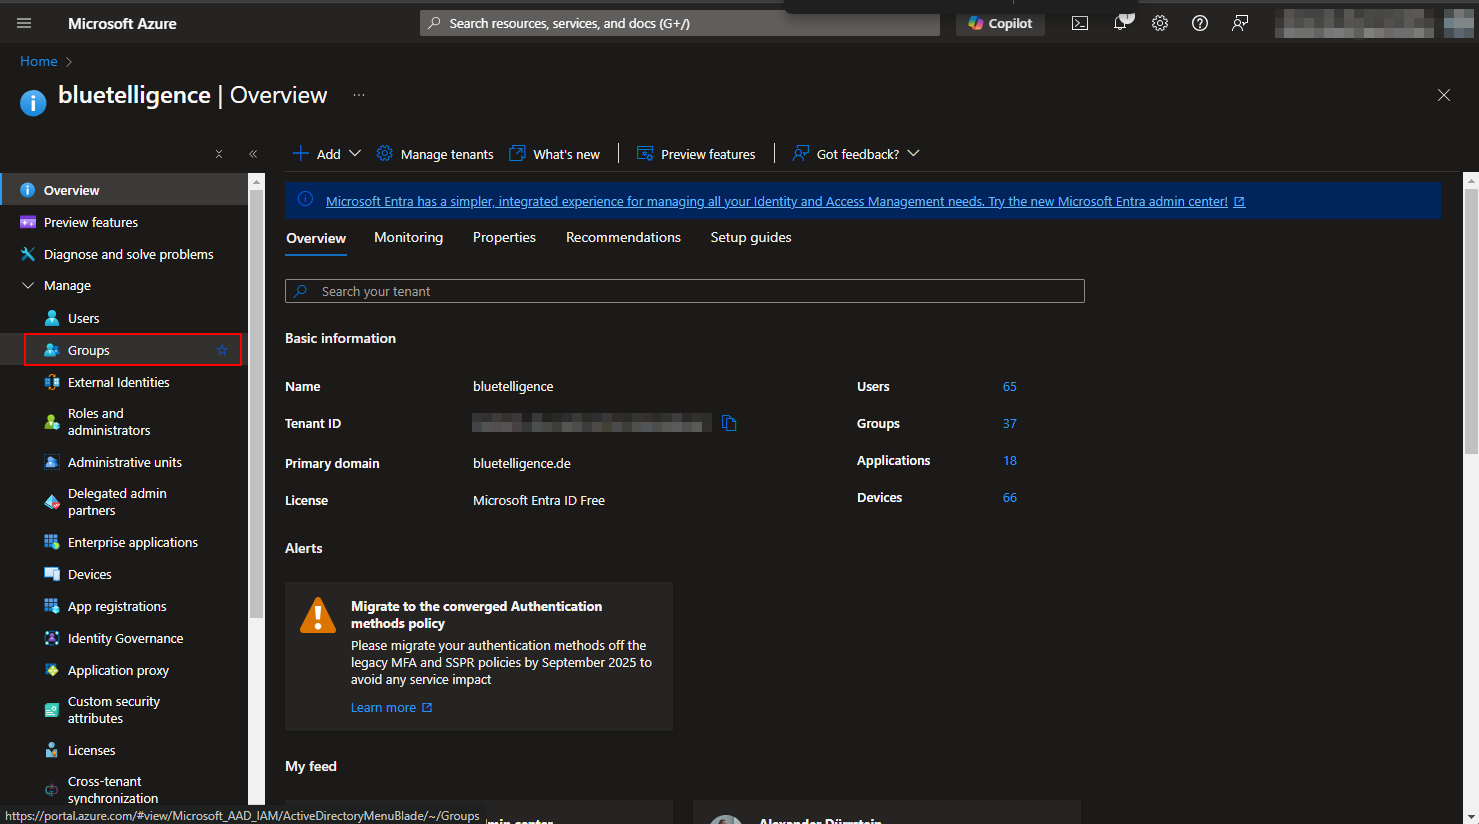
Go to groups
-
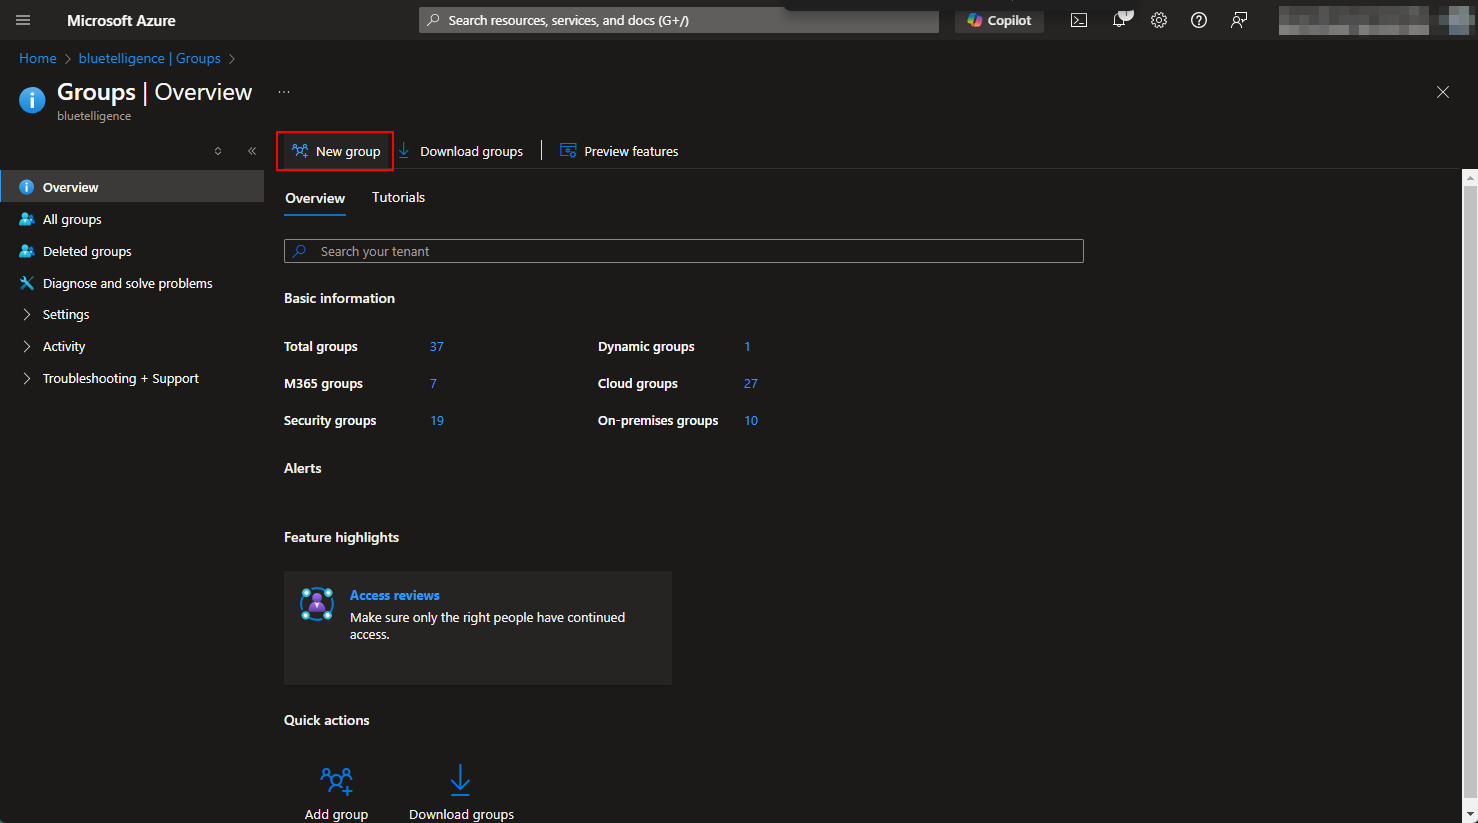
Add a new group
-
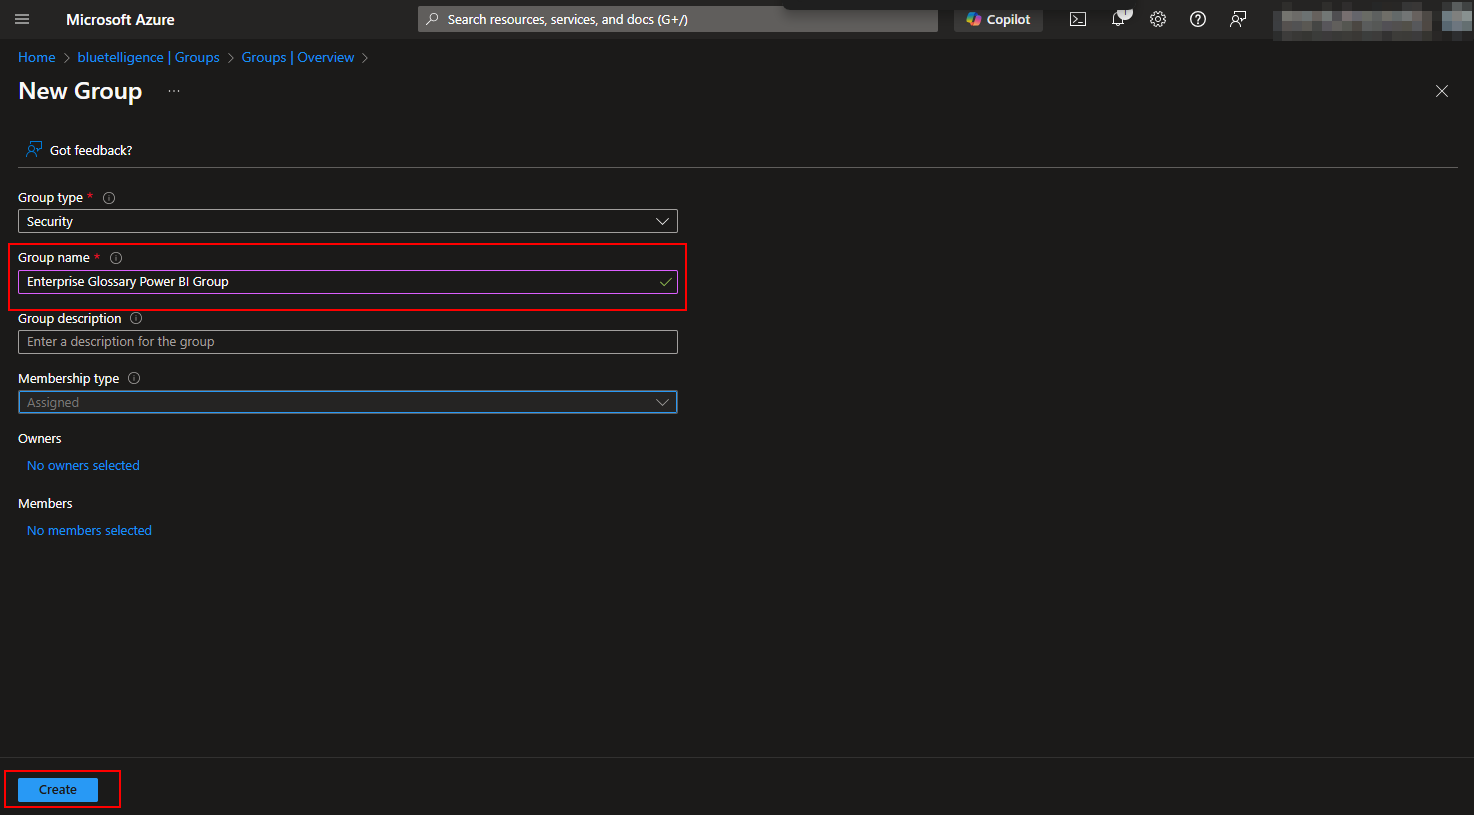
Insert a group name (e.g. Enterprise Glossary Power BI Group)
-
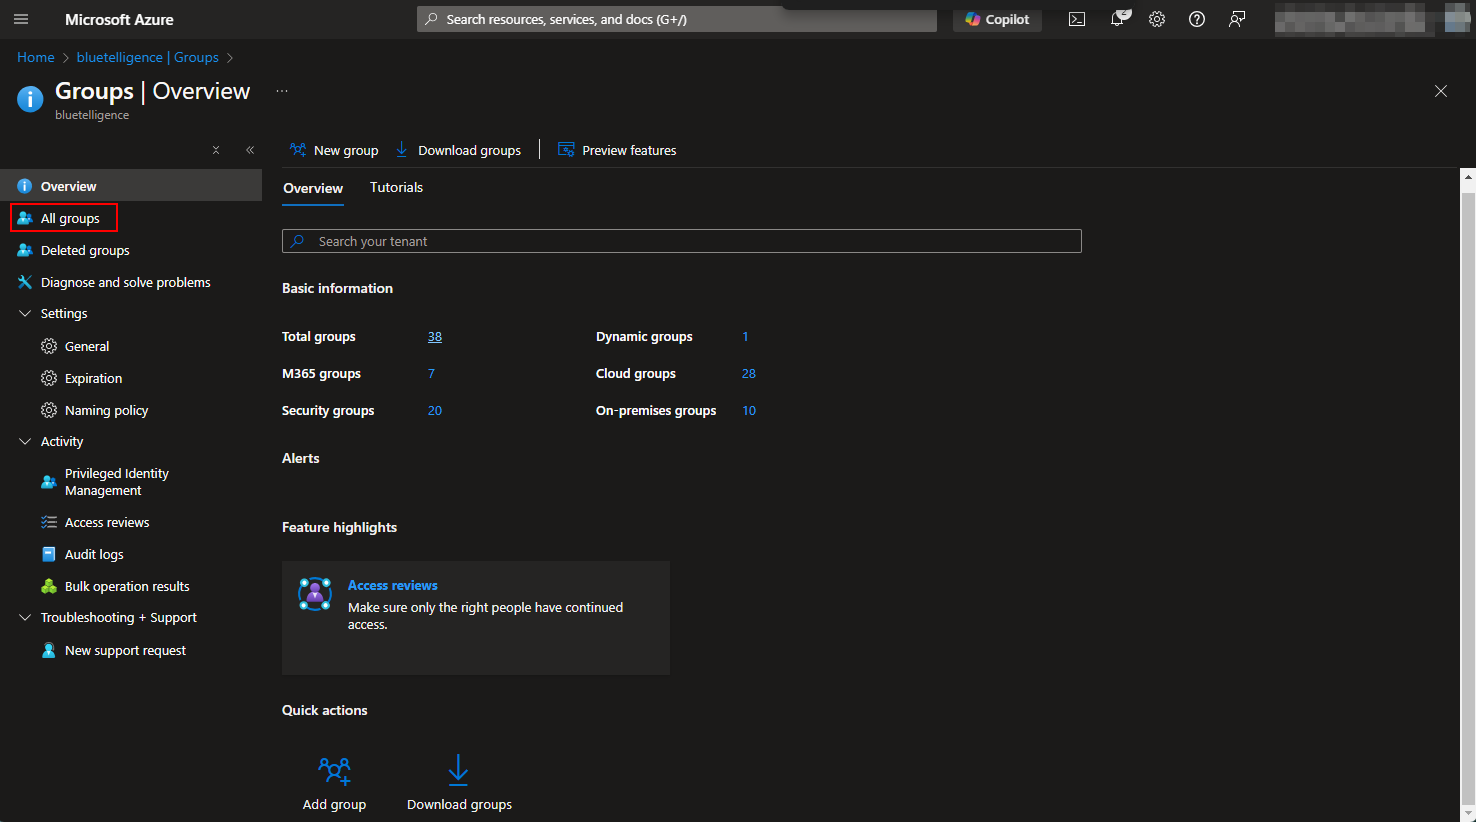
Go to All groups
-
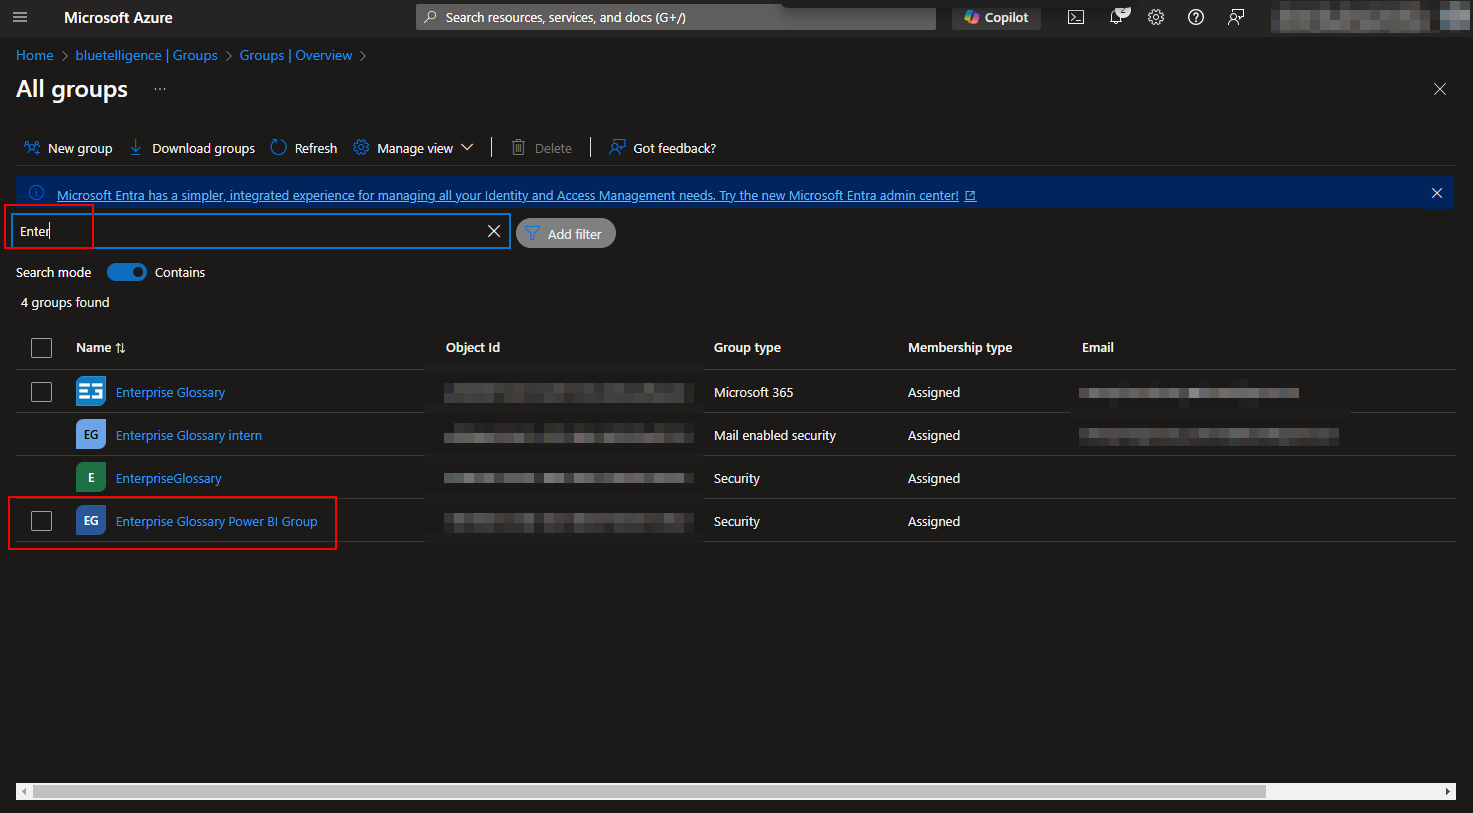
Search the group and select it
-
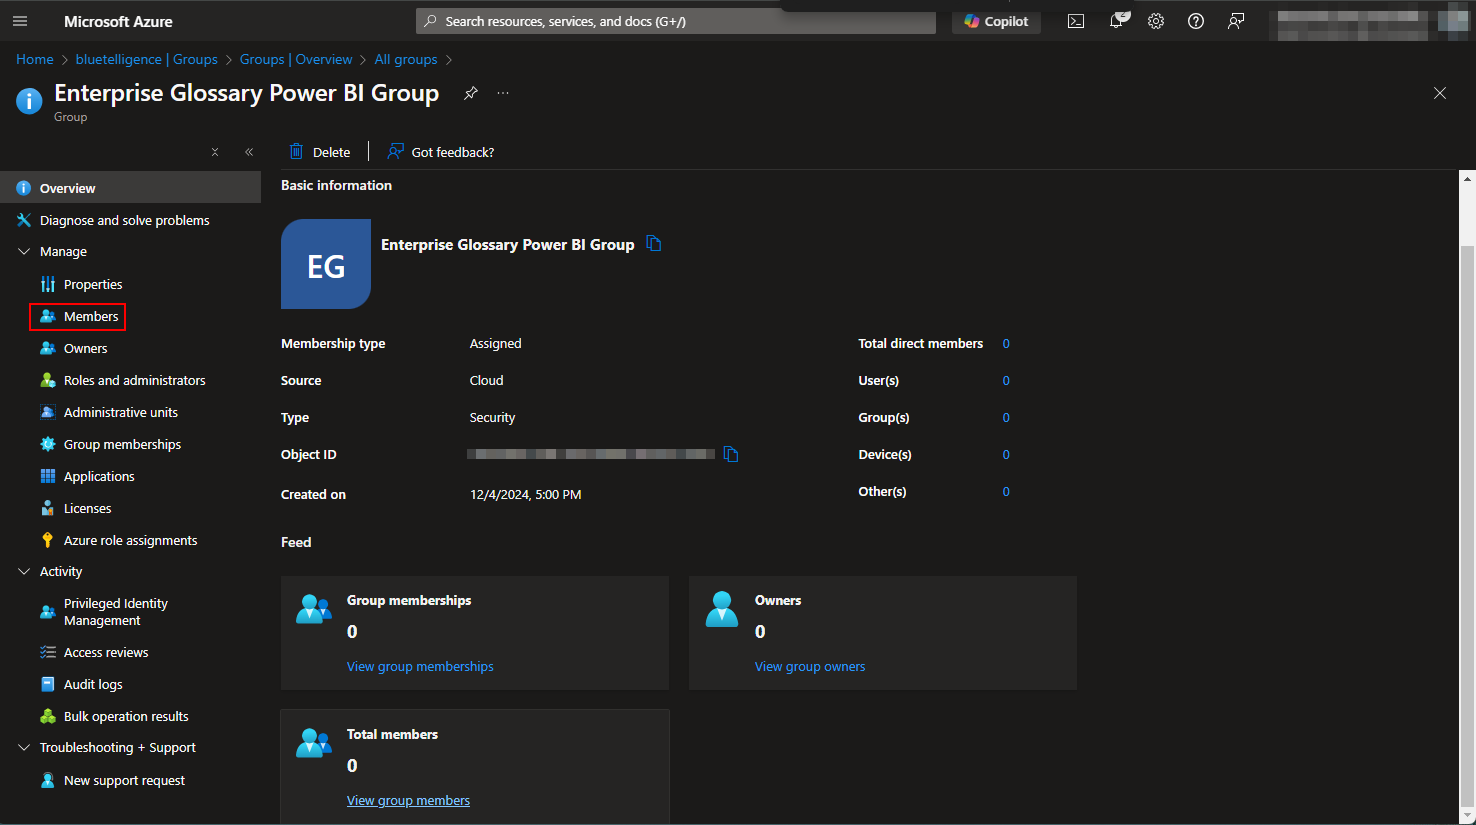
Select Members
-
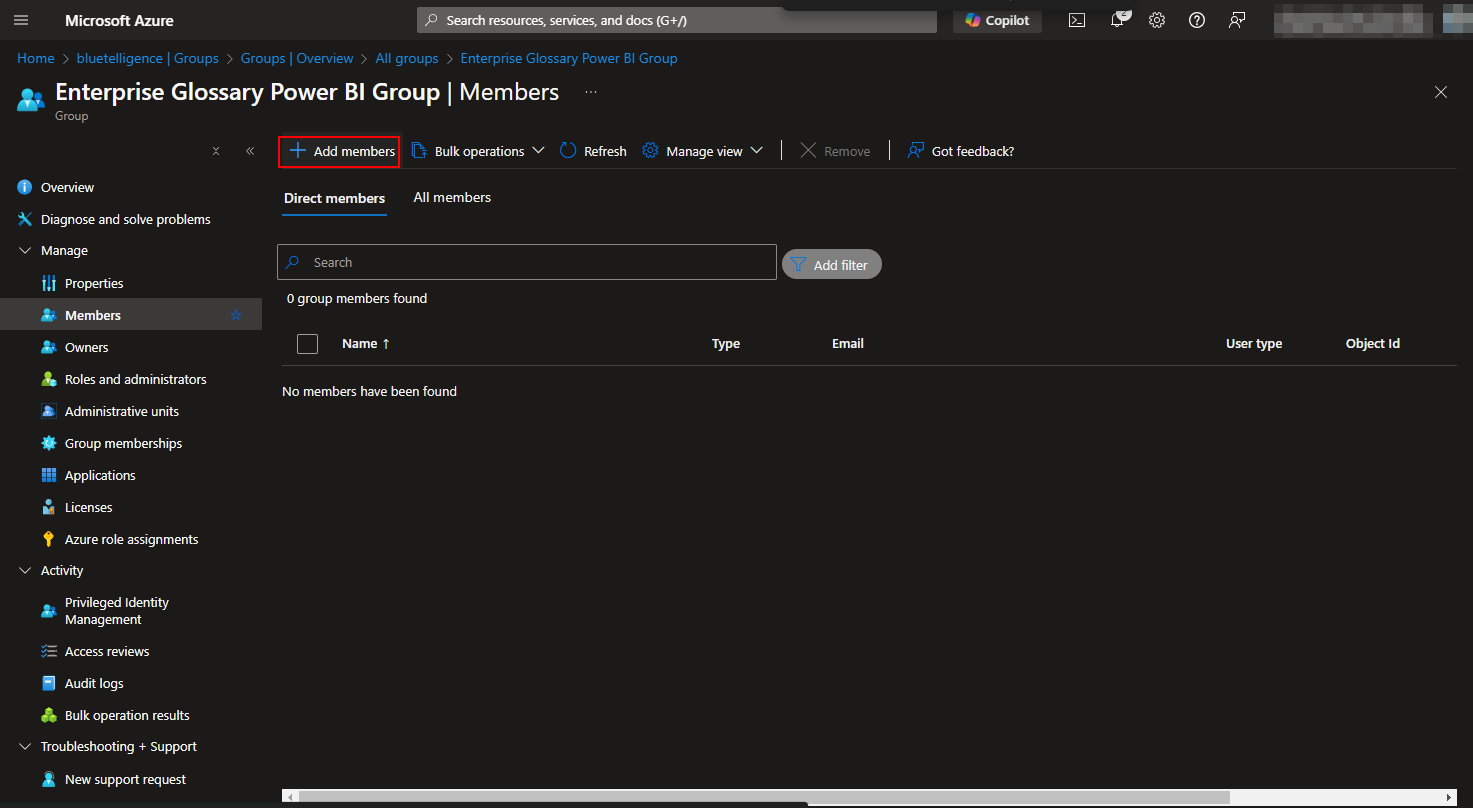
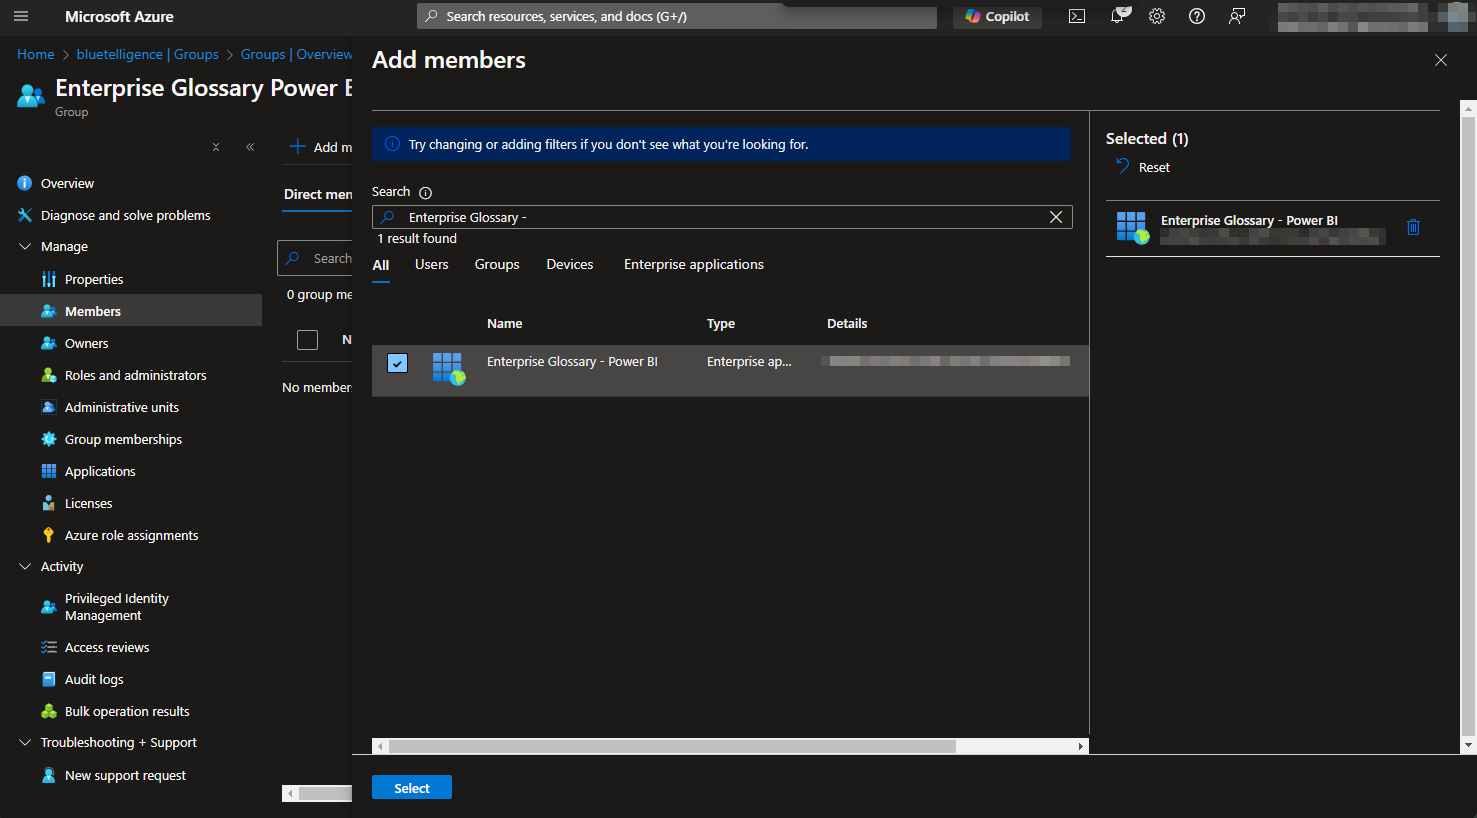
Select Add members
-
Select the App you created above in step 3 (e.g. Enterprise Glossary - Power BI)
Power BI
-
Open the Power BI Admin Settings https://app.powerbi.com/admin-portal/tenantSettings?experience=power-bi
-
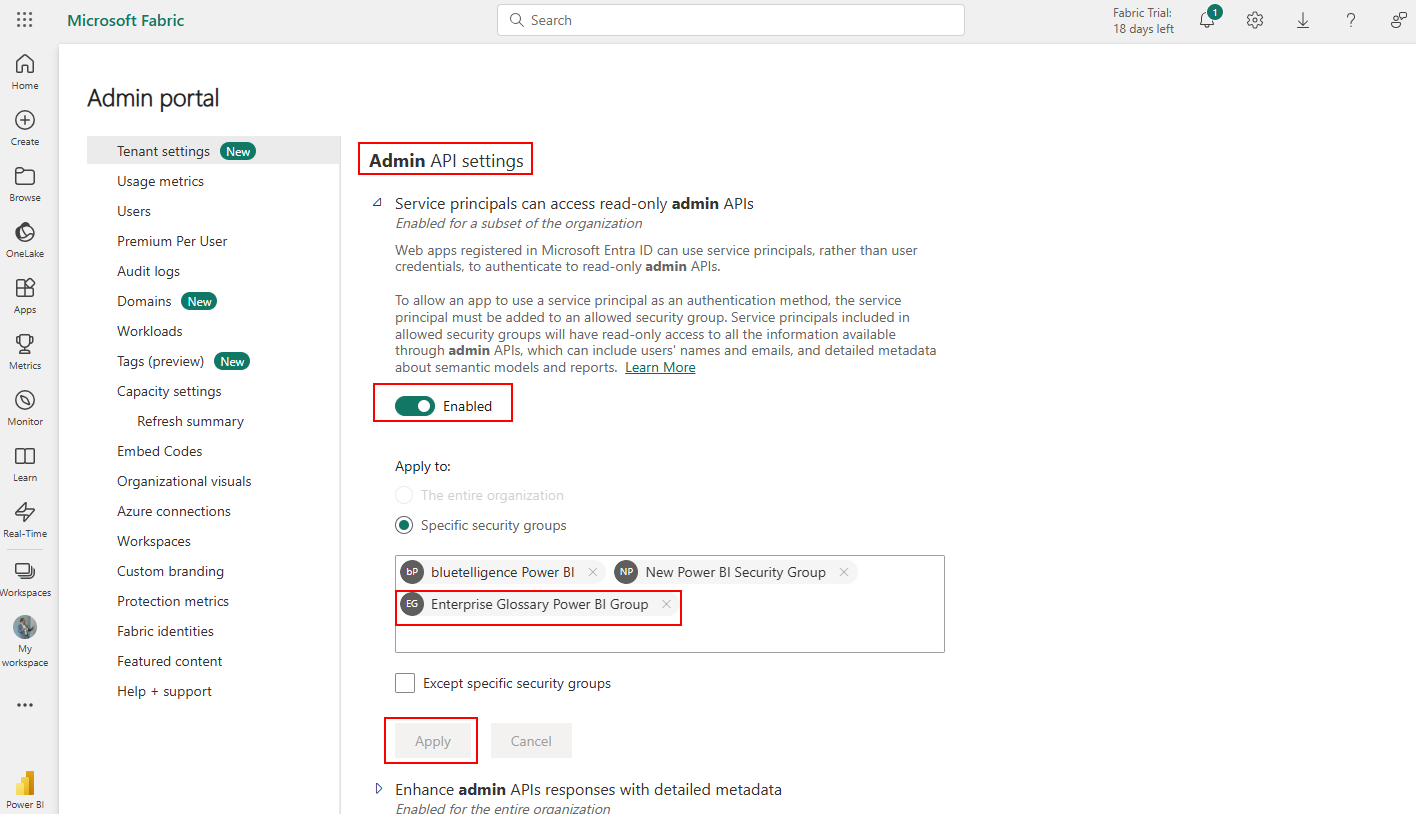
Find the category Admin API settings and maintain it
-
Enable the “Service principals can access read-only admin APIs”
-
Insert the created security group
-
Apply it
-